Windows 10 VPN Server Client PPTP Setup
Windows 10 VPN Server Client PPTP Setup
Covered in this Windows 10 VPN server client PPTP setup article and video.
Router port forwarding of TCP and UDP protocol port 1723.
Windows 10 VPN server configuration.
Setting up the Windows 10 VPN client.
Setting for windows 10 firewall inbound rules. Access shared folders and resources such as printers remotely and securely.
This article and video I will show Windows 10 VPN server client PPTP setup.
Including Windows 10 firewall settings needed for connecting to shared folders from remote locations or the public internet and not just your local area network or LAN.
This VPN configuration is not intended to hide or protect your location. It is intended to enable connectivity and some level of security when connecting to an local network resource from the internet or a WAN.
You will want to view the video and read the article if in the past after setting up a Windows 10 VPN and the VPN would connect but you receive error code 0x80070035 cannot find network path when attempting to view and or access shared folders or resources from outside your local area network such as the internet.
Network Troubleshooting report shows issue found: Windows can’t communicate with the device or resource. Make sure device or resource allows incoming connections for File and Printer Sharing.
I will start the Windows 10 VPN server client PPTP setup instructions by getting the IP address inforamtion that will be needed to complete the configurations. Then I will show setting up the router for port forwarding of TCP and UDP protocols on port 1723. Next I will show how to setup and configure the VPN server on a Windows 10 computer. This is the computer that has the shared resources you want to connect to. Resources such as files, folders, and printers. Next the setup of a shared folder on the computer adcting as the VPN server with the correct folder permissions. Then the Windows 10 firewall configuration for inbound rules for TCP and UDP port 1723 and the firewall settings that will allow you to access the shared folder or folders on the VPN server from outside your local area network like from the internet or a WAN. Then the Windows 10 PPTP VPN client configuration. This is setup on the Windows 10 computer that will used as the remote computer to connect to the VPN server either across a local area network or across the internet or WAN depending on which Windows firewall rule you implement.
Video showing Windows 10 VPN server client PPTP setup including Window firewall and router configuration settings.
Router setup port forwarding TCP and UDP protocol on port 1723
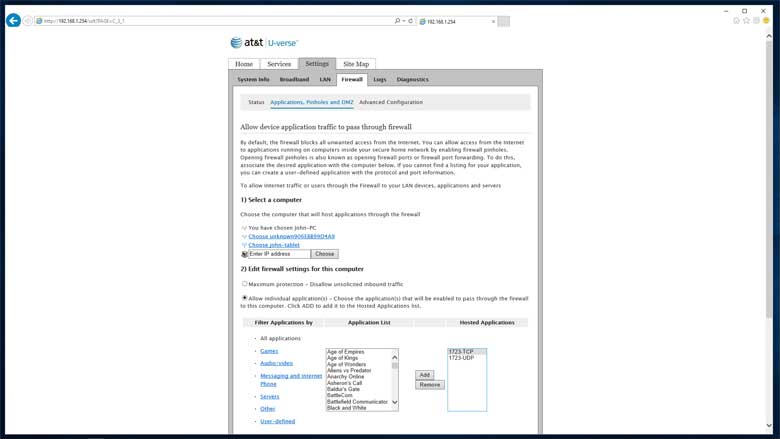
This setup will differ depending on the make and model of your router. In my example I’m using a 2Wire 3600 HGV modem with built-in wireless router. The modem / wireless router was issued to me by AT&T U-Verse.
Setup static IP for VPN server PC. If possible. If this changes you have to use the new IP address assigned by the DHCP server when connecting to the shared resources on the VPN server.
Setup port forwarding TCP and UDP port 1723.
Find public IP of router. You can also get this information by typing this command ipconfig /all in the cmd window.
You will need this IP address when setting up the VPN client.
Windows 10 VPN Server Setup

Open Settings.
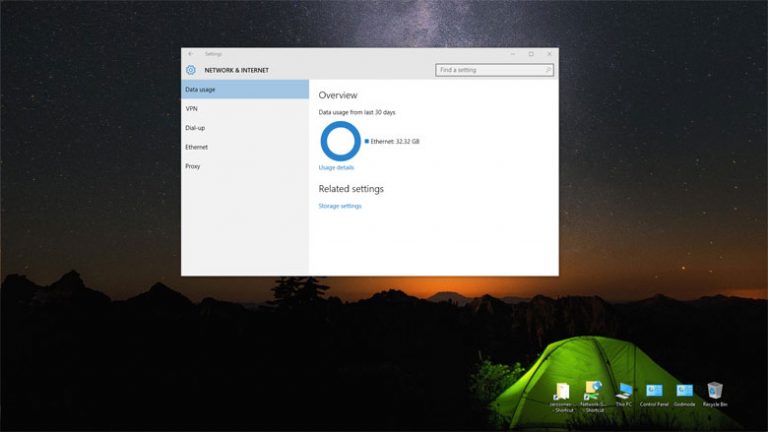
Then Network & Internet.
Select VPN.
Under Related settings select Change adapter options.
Once the Network Connections window opens press the ALT key on your keyboard.
Then click on File then New Incoming Connection.
In the Allow connections to this computer window Who may connect to this computer either select an existing user or uncheck all users if any are checked then click on Add someone.
Enter a user name.
Enter Full name.
Enter and confirm password. You will need this information when configuring the VPN client.
Click Next.
On the How will people connect page.
Check Through the Internet then click next.
On the next window highlight Internet Protocol Version 4.
Then click Properties.
The Incoming Properties window opens.
Under Network access check Allow callers to access my local area network.
Under IP address assignment change to Specify IP address.
Use an IP range either outside the DHCP range or a IP address that is unlikely to be assign by the DHCP server.
Click on Allow access.
That’s it for the VPN server setup.
Create Windows 10 VPN server shared folder and assign folder permissions.
You can create the shared folder at any location you want. For this example I will create it on the desktop of the Windows 10 VPN server.
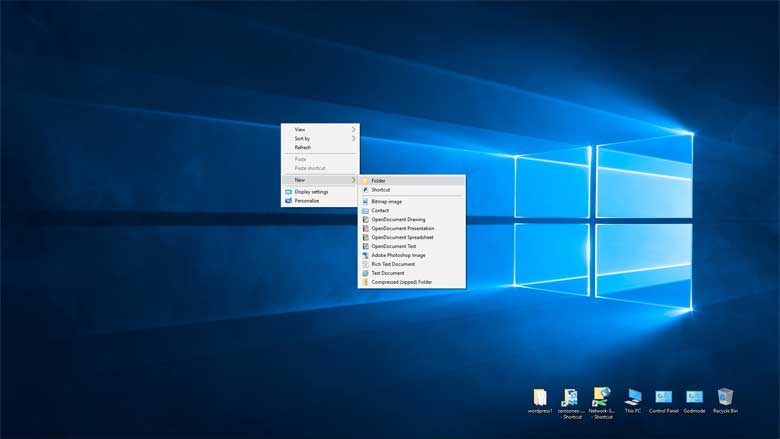
To Create the shared folder on the desktop.
Right click on an open space of your desktop.
Hover over new then select folder.
Name folder. I will name mine vpn-share.
Right click on the newly created folder.
Select Properties.
Click on the Sharing tab.
Then click Share.
In the Choose people to share with click on the drop down then select Everyone and click Add.
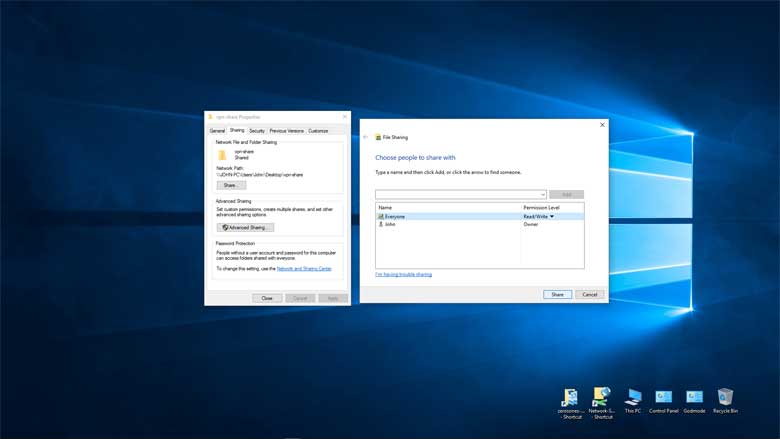
Then click on Everyone and change Permission level from Read to Read/Write then click Share.
click Done.
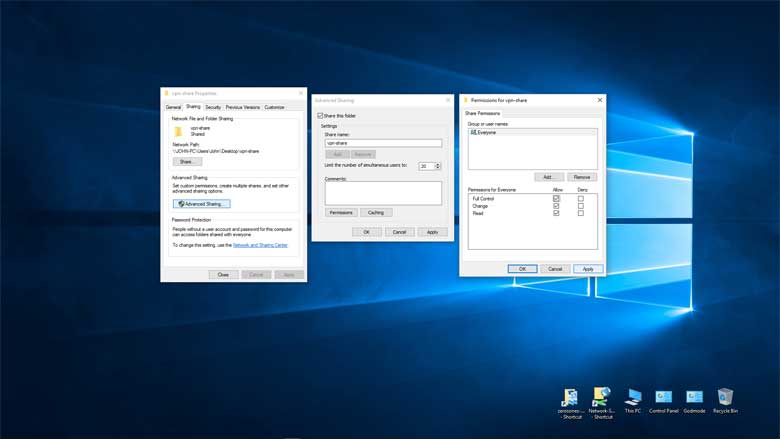
Now click on Advanced Sharing
Check Share this folder.
Then click on Permissions.
Select Everyone or user you created.
Check Full Control Allow.
Click Apply
OK.
Apply.
OK.
Click Close.
You now have a shared folder with the correct permissions to use once you are connected to the VPN server using the PPTP VPN connection.
We are all most done with Windows 10 VPN Server Client PPTP Setup.
Now on to the Windows 10 firewall configuration.
Windows 10 firewall configuration.
Open Settings.
Then Network & Internet.
Select VPN.
Then under Related settings select Windows Firewall.
In the Windows firewall window Select Advanced settings.
Then select Inbound Rules.
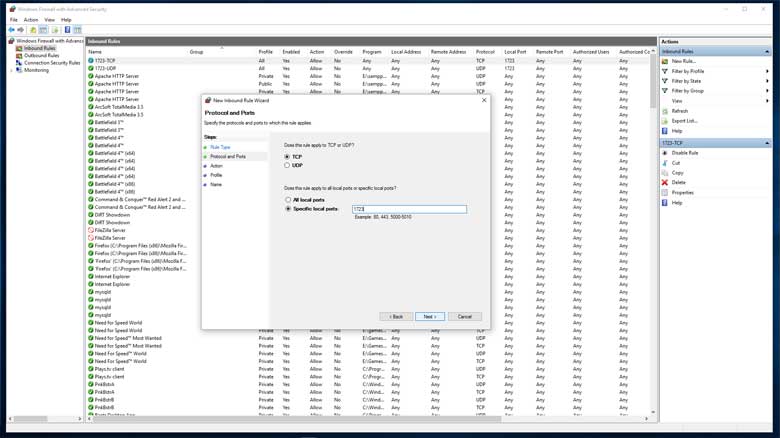
Then right click on Inbound Rules and select New Rule.
Select Port then Next.
Select TCP and Specify local ports enter 1723 in the box then Next.
Allow the connection should be selected then click Next.
On the When does this rule apply Domain, Private, and Public should be checked. Then click Next.
Name the rule. I used 1723-tcp. Click Finish.
Now you need to create the Inbound Rule for UDP on port 1723. You do this the same way as you created the TCP port 1723 rule except select UDP and Specify local ports enter 1723 in the box then Next.
After you have finished setting up the TCP port 1723 and the UDP port 1723 Inbound Rule you are done with the configuration for using the VPN when both server and client are connected to the same local area network. You will be able to see and use your shared folders when both client and server are connected to the same LAN or local area network.
If you try to use the VPN from a remote location such as your local Starbucks Wi-Fi the VPN connection will connect but you probably won’t be able to see or use the shared folder on the VPN server you setup.
In order to have access to the shared folder on the VPN server through the VPN tunnel from a remote location you will need to change one firewall settings. I will cover the firewall setting changes to access shared resources through the VPN from the internet next.
Windows 10 Firewall settings enable access to shared folder from public internet or WAN
This is the fix for error code 0x80070035 when attempting to view and or access shared folders from outside your local area network.
Network Troubleshooting report shows issue found: Windows can’t communicate with the device or resource. Make sure device or resource allows incoming connections for File and Printer Sharing.
To begin.
Open Settings.
Then Network & Internet.
Select VPN.
Then under Related settings.
Select Windows Firewall.
In the Windows firewall window Select Advanced settings.
Then select Inbound Rules.
All the Inbound Rules should now be visible.
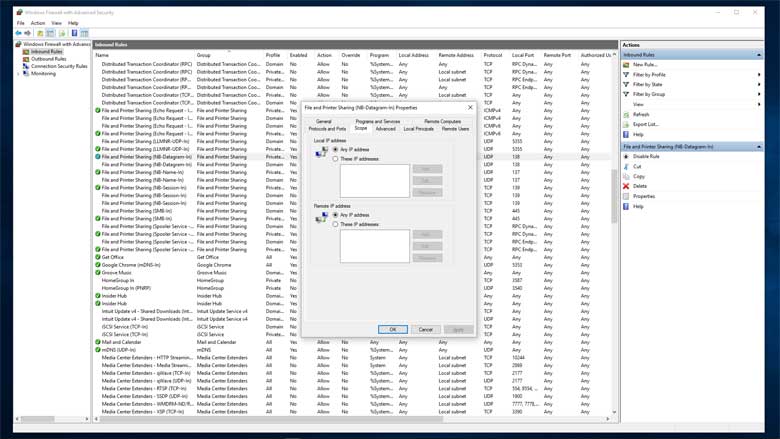
Scroll down the Inbound Rules until you find the File and Printer Sharing listings. When selecting the File and Printer Sharing rules make sure you are selecting the rule with the Profile of Private, Public and not Domain. Unless you want to include Domains.
Double Click on the Inbound Rule File and Printer Sharing (NB-SMB-In) with the Profile of Private, Public.
We need to change the Scope Properties Remote IP address, (These IP addresses, local subnet) change this setting to Remote IP address, (Any IP address).
To edit the Inbound File and Printer Sharing rule for File and Printer Sharing (NB-SMB-In) simply double click on the rule.
Then select the Scope tab.
In the Remote IP address section bullet These IP address,
then add,
then bullet Predefined set of computers,
then from the drop down menu select Internet
then OK
apply and OK.
Another way to allow SMB sharing from remote IP addresses is to bullet (Any IP address) in Remote IP address section.
Click Apply.
Then OK.
That’s it.
Setting up the Windows 10 VPN client.
Open Settings.
Then Network & Internet.
Select VPN.
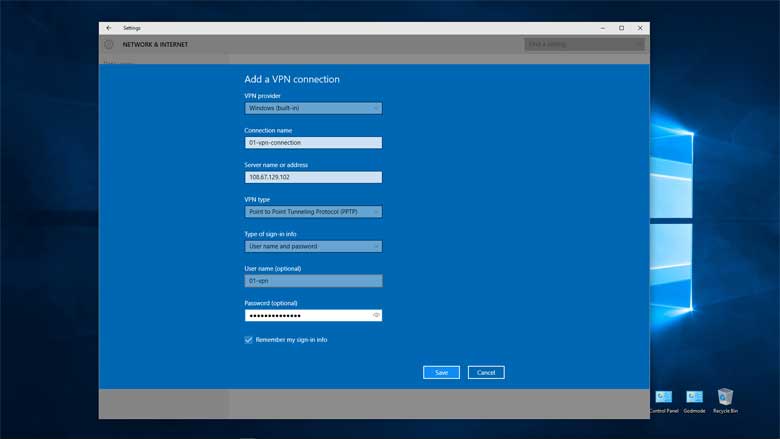
Select Add a VPN connection.
Under VPN provider select Windows (Built in).
Under Connection name the name of the connection.
Server name or address. Enter the public WAN IP address from the router.
Under VPN change to Point to Point Tunneling Protocol (PPTP).
Type of sign-in info. Select User name and password.
Enter user name. This is the user name used when the setting up the server side of the VPN.
Enter password. This is the password used when the setting up the server side of the VPN.
Check Remember my sign-in info if you want to.
Click Save.
That’s it for the Windows 10 VPN Client setup.
You will now be able to make a VPN connection using PPTP (Point to Point Tunneling Protocol) from a client computer into the VPN server you created and access shared folders on that computer from the outside your local area network as an example from your local Starbucks or McDonld’s Wi-Fi network.
I hope you found our Windows 10 VPN server client PPTP setup video and article useful.
Thanks for stopping by and viewing our Windows 10 VPN server client PPTP setup article and video.
Be sure to visit the Zeros Ones YouTube channel and give us a like or subscribe to our channel.
Follow us on Twitter
Follow us on Facebook