
Create Windows hidden folder
Create Windows hidden folder
How to create a Windows hidden folder or transparent folder on your Windows desktop.
This can really help clean up your Windows desktop from clutter.
Another benefit to a hidden or transparent folder is a certain level of privacy.
Depending on the folder name you choose and the complexity of the desktop background you are using this hidden or transparent folder can become truly hidden.
In the image below there are two hidden or transparent folders in the lower left corner area the folders are named 1 and 2.

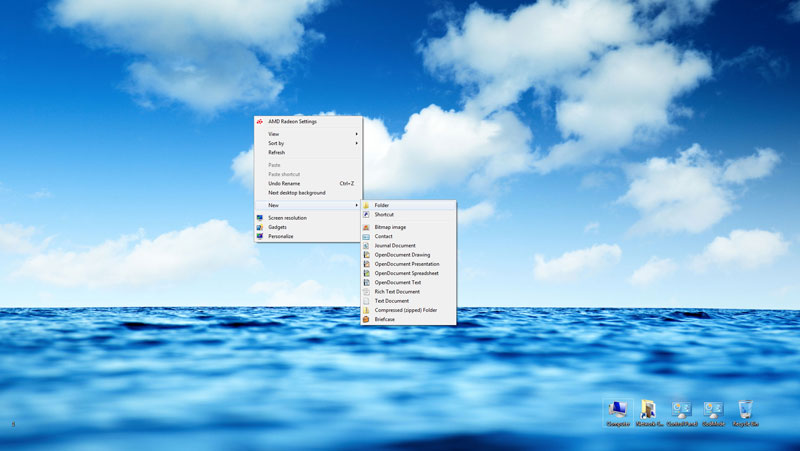
Create new folder
To create a hidden folder you need to start by creating a new folder on your desktop.
You create a new folder by right clicking on a open space on your desktop and select New then Folder.
Name the folder what every you want.
I choose to use numbers in this example but, you can use any folder naming scheme you want.
Set folder Properties and Customize folder icon
Next right click on the new folder you created and select Properties.
Then the Customize tab.
Then the Change icon button.
Once you are in the change icon area scroll and look for some open space within all the icons and click in that open area.
You should now see a blue square where the blank space was.
![]()
Save settings and finish
Then click OK
Then Apply
Then OK
Your folder should now look like this one.

You have now created a Windows hidden folder or transparent folder.
So get rid of that clutter and clean up your Windows desktop work space.
Hope you enjoy this tip!
For WordPress website design call Zeros Ones.